
Mini Thanksgiving Pie Gift Boxes

In an effort to discourage gathering for the holidays on a blog specifically intended for entertaining ideas, I had to think a little bit outside of the BOX this year (sorry not sorry about that pun). How can you enjoy the cozy Thanksgiving traditions of yesteryears while being socially distant and responsible? Well I bring you… Mini Thanksgiving pie gift boxes!
This DIY was actually inspired by an Anthropologie item that I’ve been swooning over this season — their wooden bake-and-take pie box — this reusable pie keeper is so adorable and makes the perfect gift wrapping for sending a loved one a yummy baked good!
But with the pandemic this year, I thought it would be best to physically share as little as possible, so how cute would it be to bake individual pies for your family to enjoy?
If you’re celebrating distant-ly this year, I love the idea of baking these pies, placing them each in their own pie gift box, and delivering them to your friends and family to enjoy together-but-separately via zoom!


To make these super cute personal pie boxes, you will just need:
Paper-mache round gift boxes (about 4in diameter)
Acrylic paint
3” Aluminum foil pie pans
Your favorite pie recipe (and ingredients!)
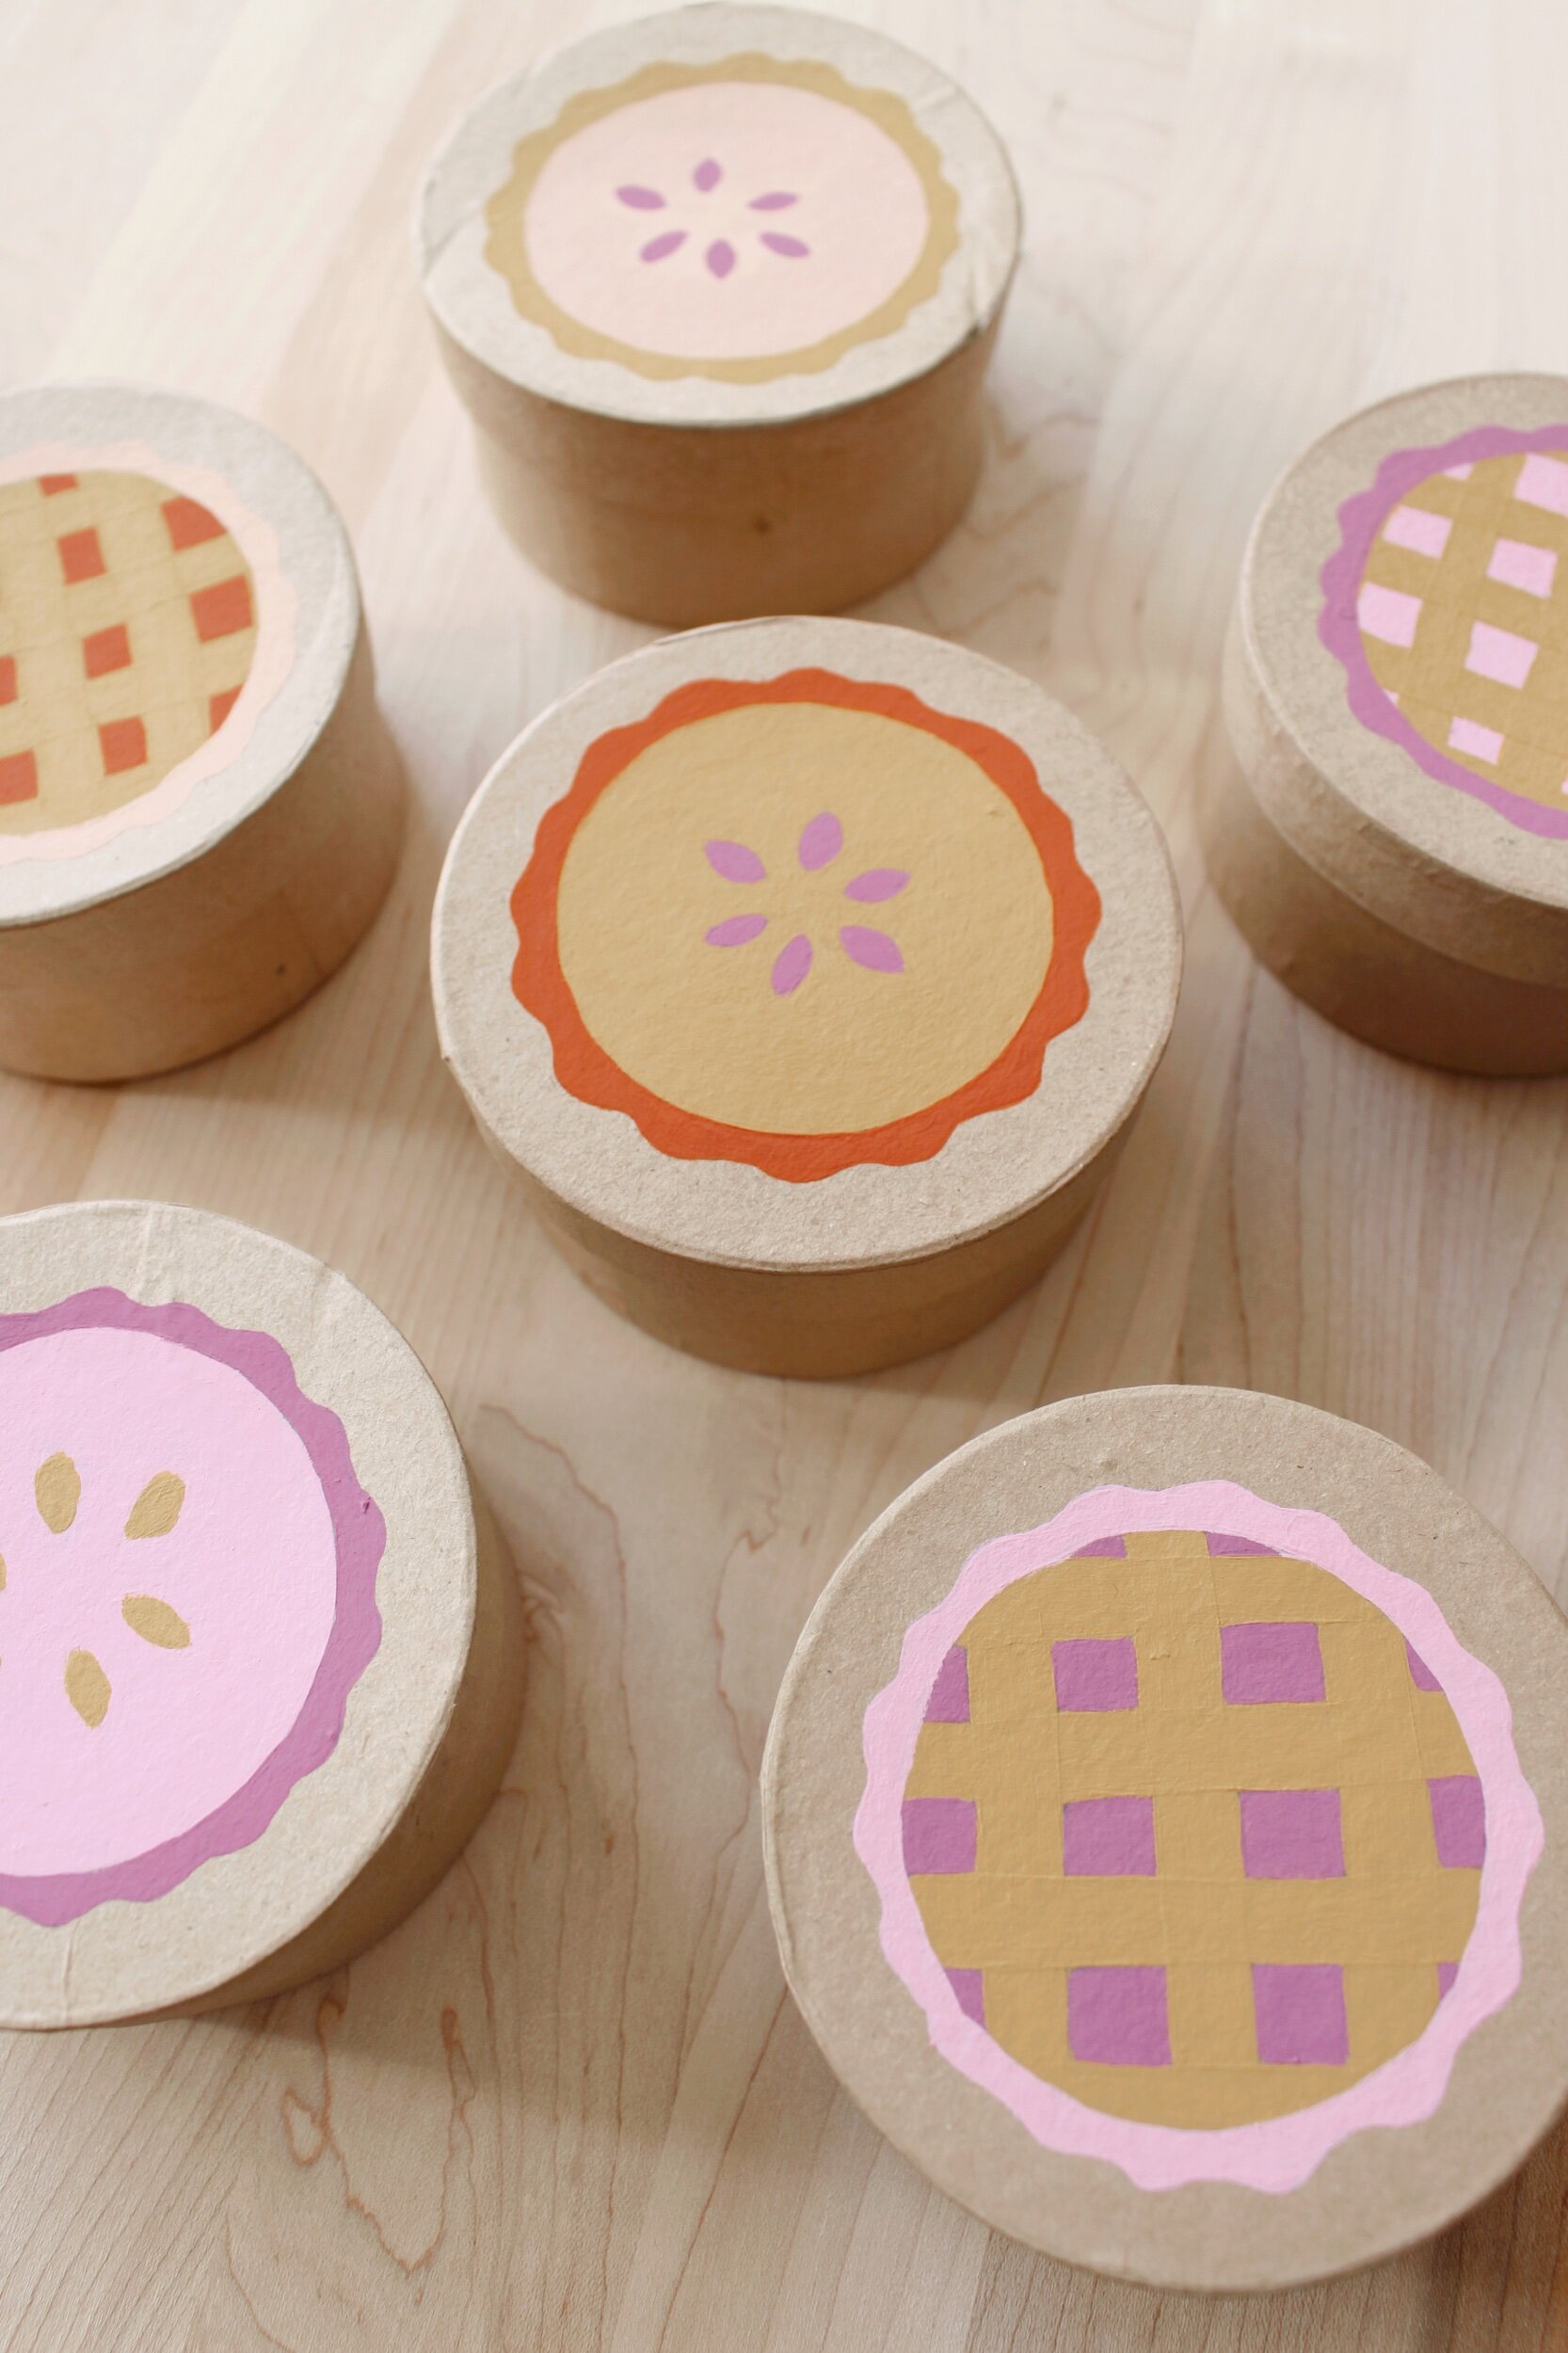
The first step is to draw a pie illustration on the top of each gift box in pencil. I drew on paper first to make sure I had the shapes correct before drawing on the boxes. I used a glass to make a perfect circle and then added in some pie crust details.

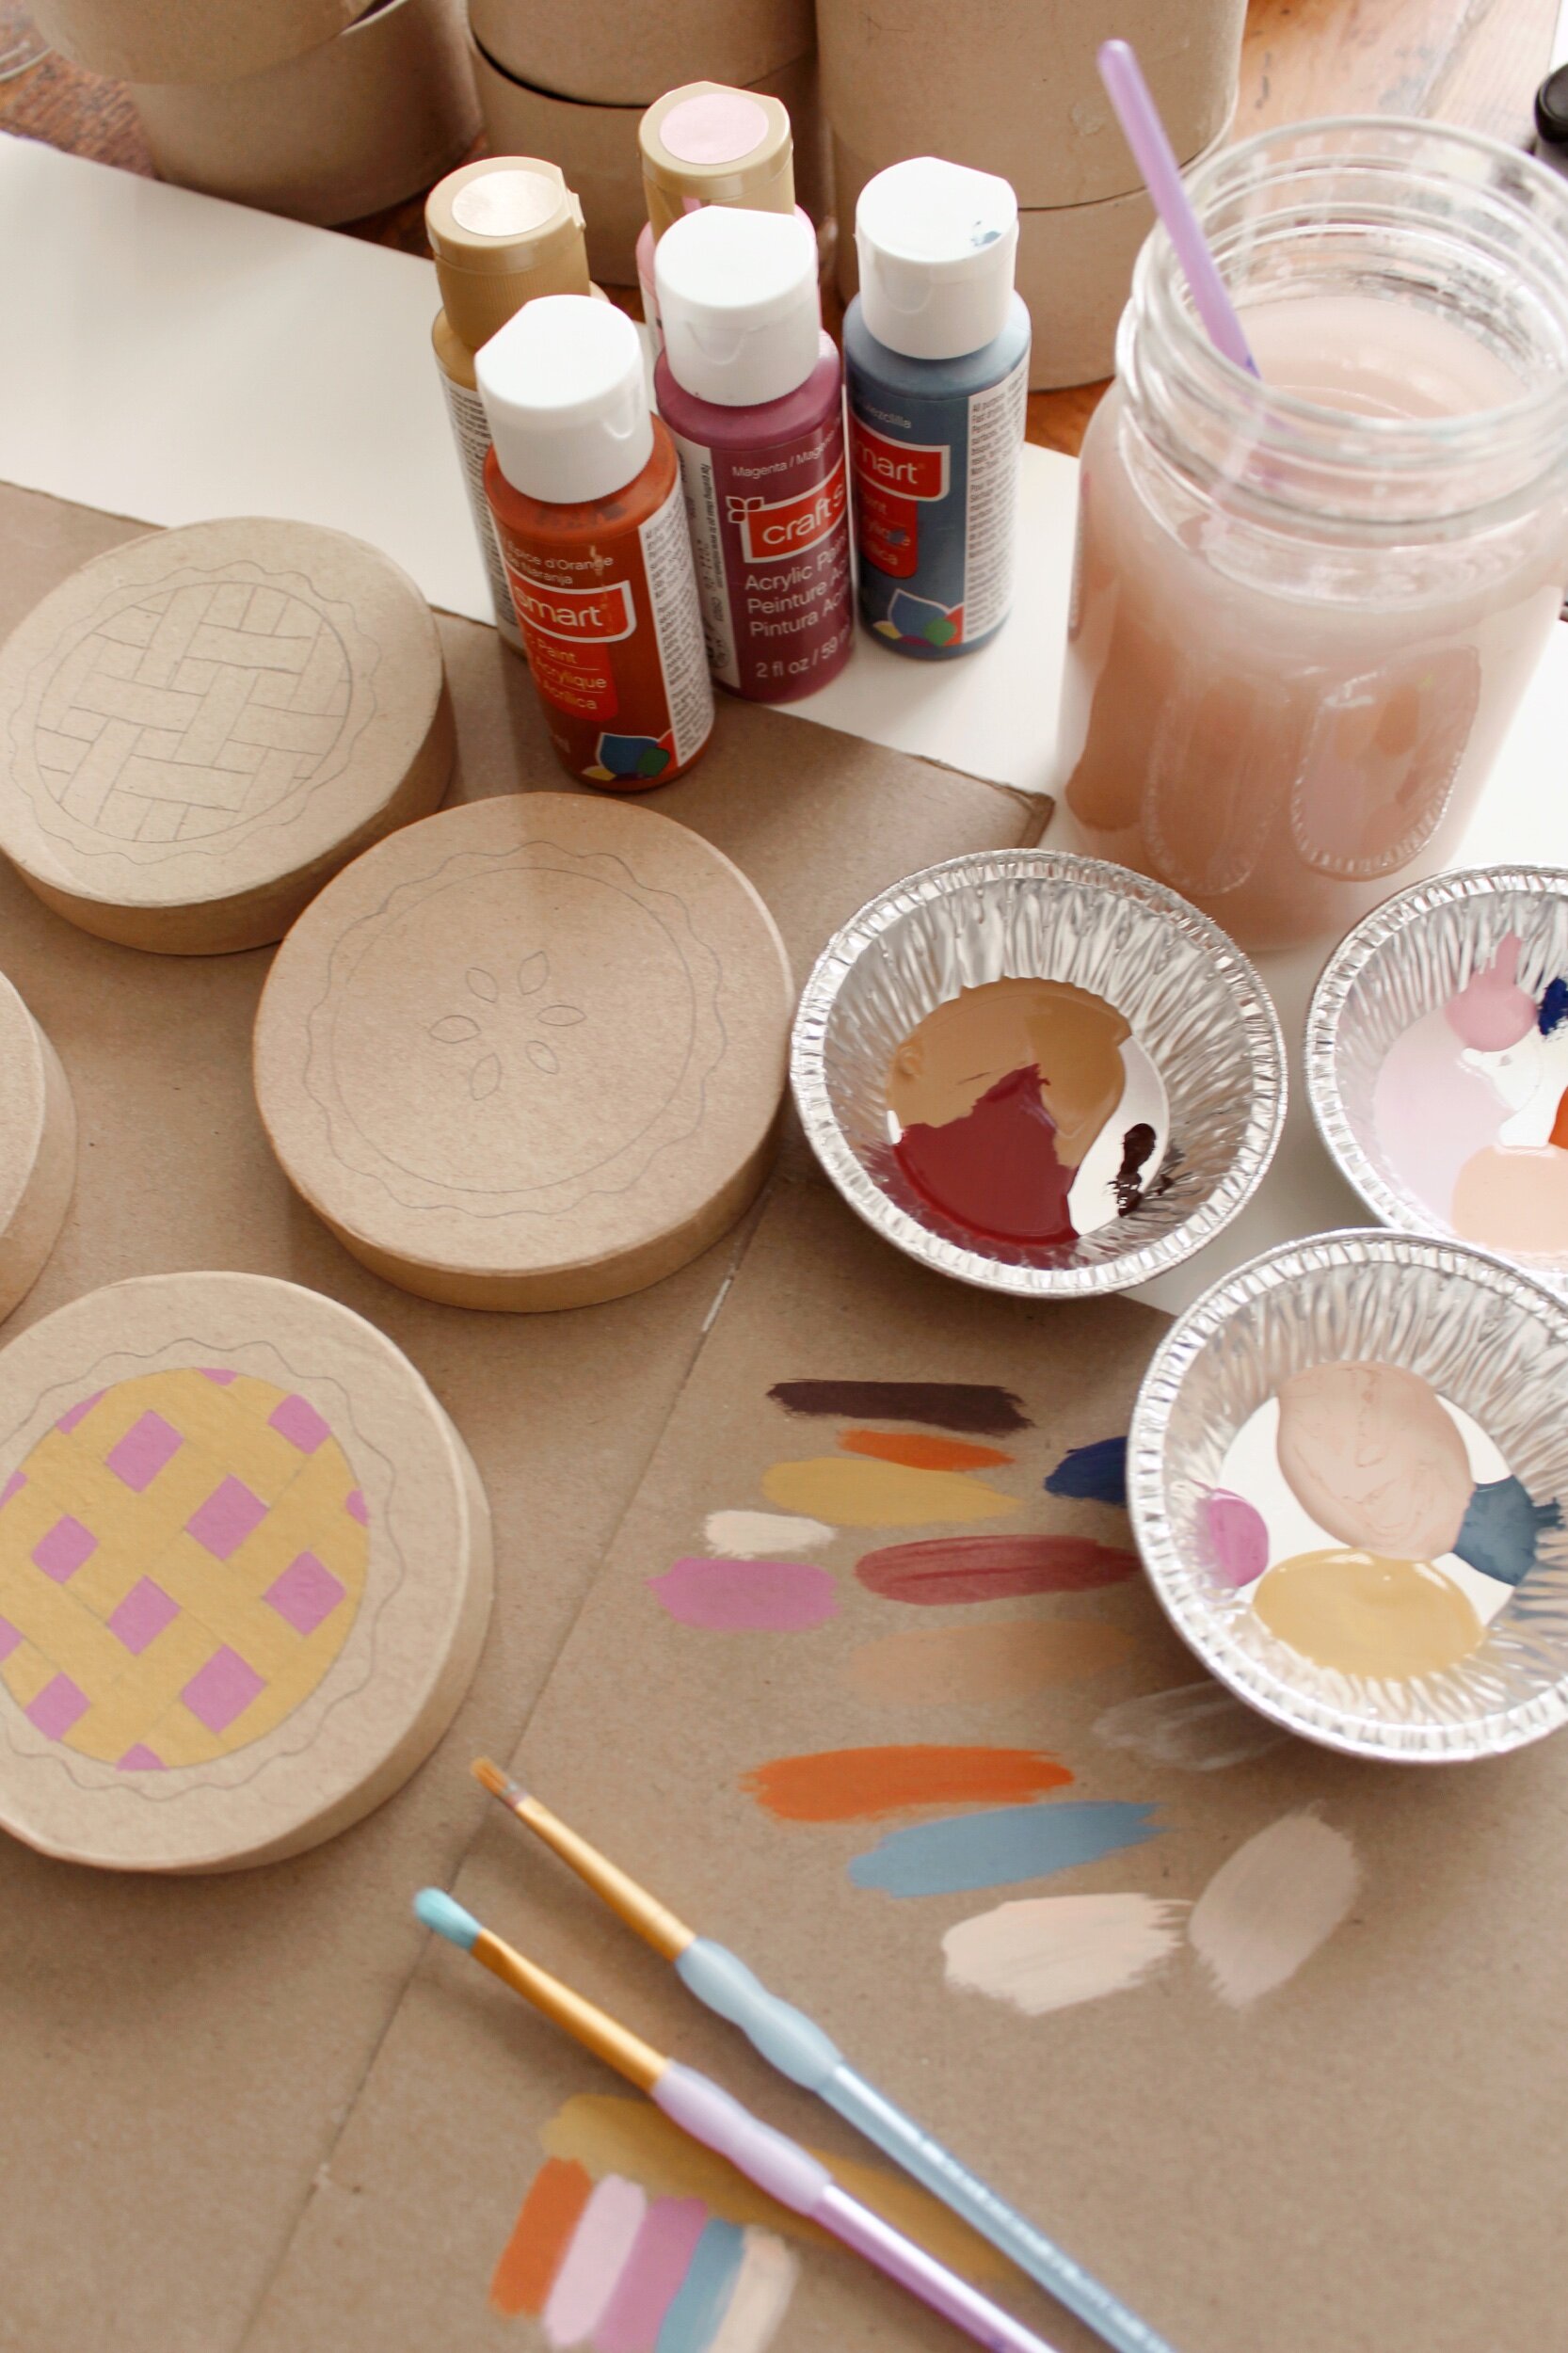
Next, I painted the illustrations. It took me a few tries to pick out the exact colors I wanted and I ended up doing about 2-3 coats of each color. I would recommend matching them to your thanksgiving table decor if you want to include them in your tablescape.
Next step, baking! (Or if you’re me, enlist a friend who loves to bake!) We ended up using a pre-made pie crust, but if you have a good recipe (and some extra time) then more power to ya. Make sure to flour your surface before you roll out your dough so it doesn’t stick.
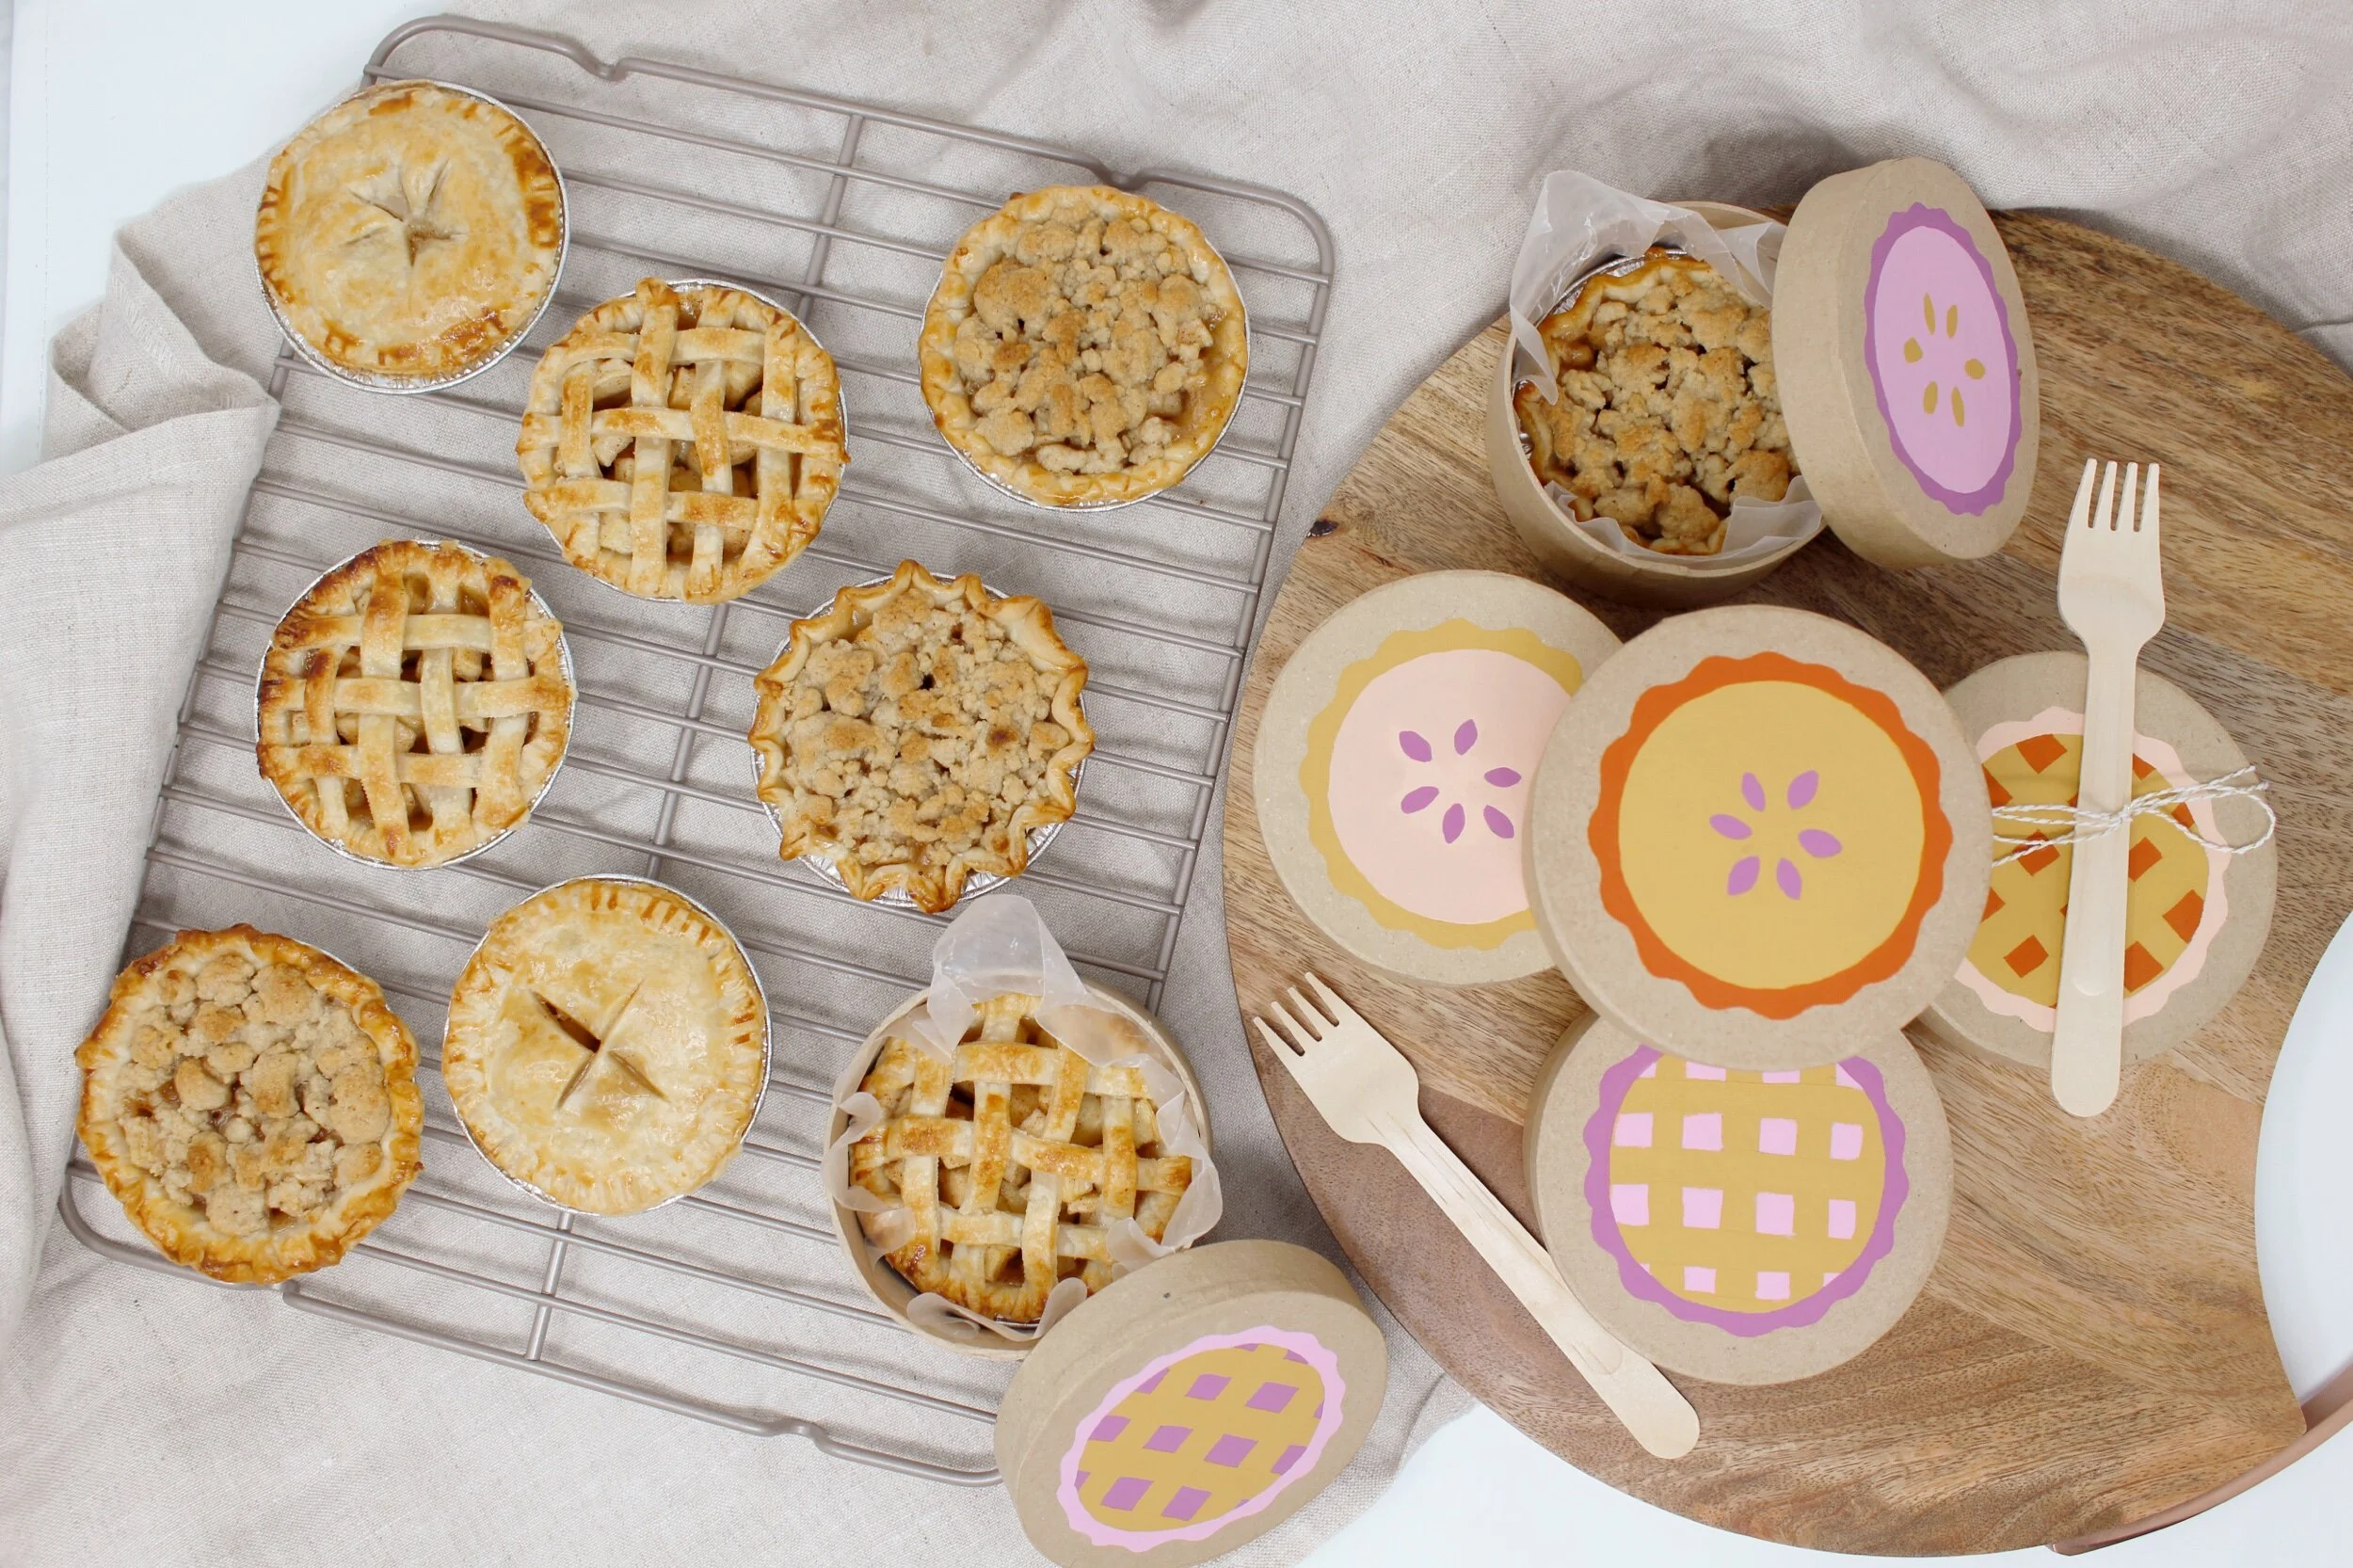
Cut out your pie crust dough to fit into the 3” aluminum foil tins. We played around with a few different edge styles. I love the mismatched look!


Now it is time to fill your crust with your pie filling of choice. We did an apple pie, but I think a berry pie or a pecan would be so delish too. Or even a mini pumpkin pie (I’m crying just thinking about how cute this would look!)


Next, Amy used her expert abilities and precision to cut out a few different styles of pie tops. We did a full crust, a lattice, and a crumble. They all turned out SO cute.
(We brushed the top with an egg wash and added a sprinkle of sugar)
And finally, bake your pies right in the aluminum foil pans and voila!


Once the pies have cooled, add a piece of wax paper into the bottom of the box and drop in your 3” pie. It should fit perfectly, and the wax paper will help you to be able to pull it out if you don’t want to eat it straight out of the box (but I mean, why wait?!)

Gift your mini pies to your friends and family, drop them off on a coworker’s porch, or add them to your thanksgiving dinner tablescape! But just a friendly reminder, keep your gatherings small with close family only this year, or better yet, enjoy your mini pies separately over zoom. Or honestly just eat them all yourself, no judgement here! Whatever you’re doing this year, I hope you get the chance to pause and reflect, after a rollercoaster of a year, on all the things we have to be thankful for and the people we love.
Happy Thanksgiving, friends! - xo Rachael
p.s. a special THANK YOU to Amy for helping me out with this post, you pies turned out perfect and were eaten in record time in our household!


