
Postage Stamp Magnets with Polymer Clay
I’ve been seeing polymer clay magnets all over the internet lately, and judging from the desolate clay aisle at my local craft store, I think it might be time to crown them the craft of the summer? Goodbye painted taper candles, hello polymer clay magnets. So obviously I had to make my own version!

I love the look of old vintage postage stamps and have always been a big fan of stationary and mailing/receiving letters. So naturally, I thought it would be fun to make some postage stamp magnets! This project was so easy to do, you can do it in one day. And I love how you can customize the magnets with your own designs. I think it would make a super fun girls-night activity or a creative project to do over a weekend this summer. Follow along below to see how I made them! :)
And if you are looking for any other DIY magnet tutorials, I have actually accumulated quite a few over here on Entertain the Idea, so check these out for more ideas:

Affiliate disclosure: This post may contain affiliate links. When you buy from these links, I may earn a small commission, at no additional cost to you. As an Amazon Associate, I may earn commissions from qualifying purchases from Amazon.com. Thank you for your support!
HOW TO MAKE POSTAGE STAMP MAGNETS WITH POLYMER CLAY

Supplies:
Postage stamp clay cutter (I used the 1.25” size)
Parchment paper
Corn starch
Assorted paper napkins or thin scrapbook paper (I used random cocktail napkins that I had leftover from past parties and I also used some paper from this scrapbook pack that worked really well!)
Scissors
Paint brush
Pen or pencil

STEP 1: Begin by lining your workspace with a sheet of parchment paper and preheating your oven to 230 degrees F (or 110 degrees C). Pull off a piece of your polymer clay from the pack and stretch it in your fingers to softened the clay. Once it is more pliable, use a rolling pin to carefully roll the clay flat.
I like to use paint stir sticks on either side of my rolling pin to get an even height across the whole surface. I would recommend rolling it out so it is about 1/8 in tall.


STEP 2: Dip your postage stamp clay cutter in a bit of corn starch to keep the cutter from sticking to the clay. Shake off any extra by tapping it against the side of the bowl or on a piece of paper towel.
Press the stamp cutter into the clay firmly and then carefully lift it off by shaking the sides back and forth. You can easily brush off any extra corn starch with a dry paint brush.

Pull off any excess clay around the outline of your stamp and then I like to carefully lift the clay stamp from the parchment paper to smooth out the edges with my fingers. I found the spatula tool from my Cricut tool set worked well for picking it up without damaging the shape.
Repeat steps 1-2 until you have as many clay postage stamps as you would like!
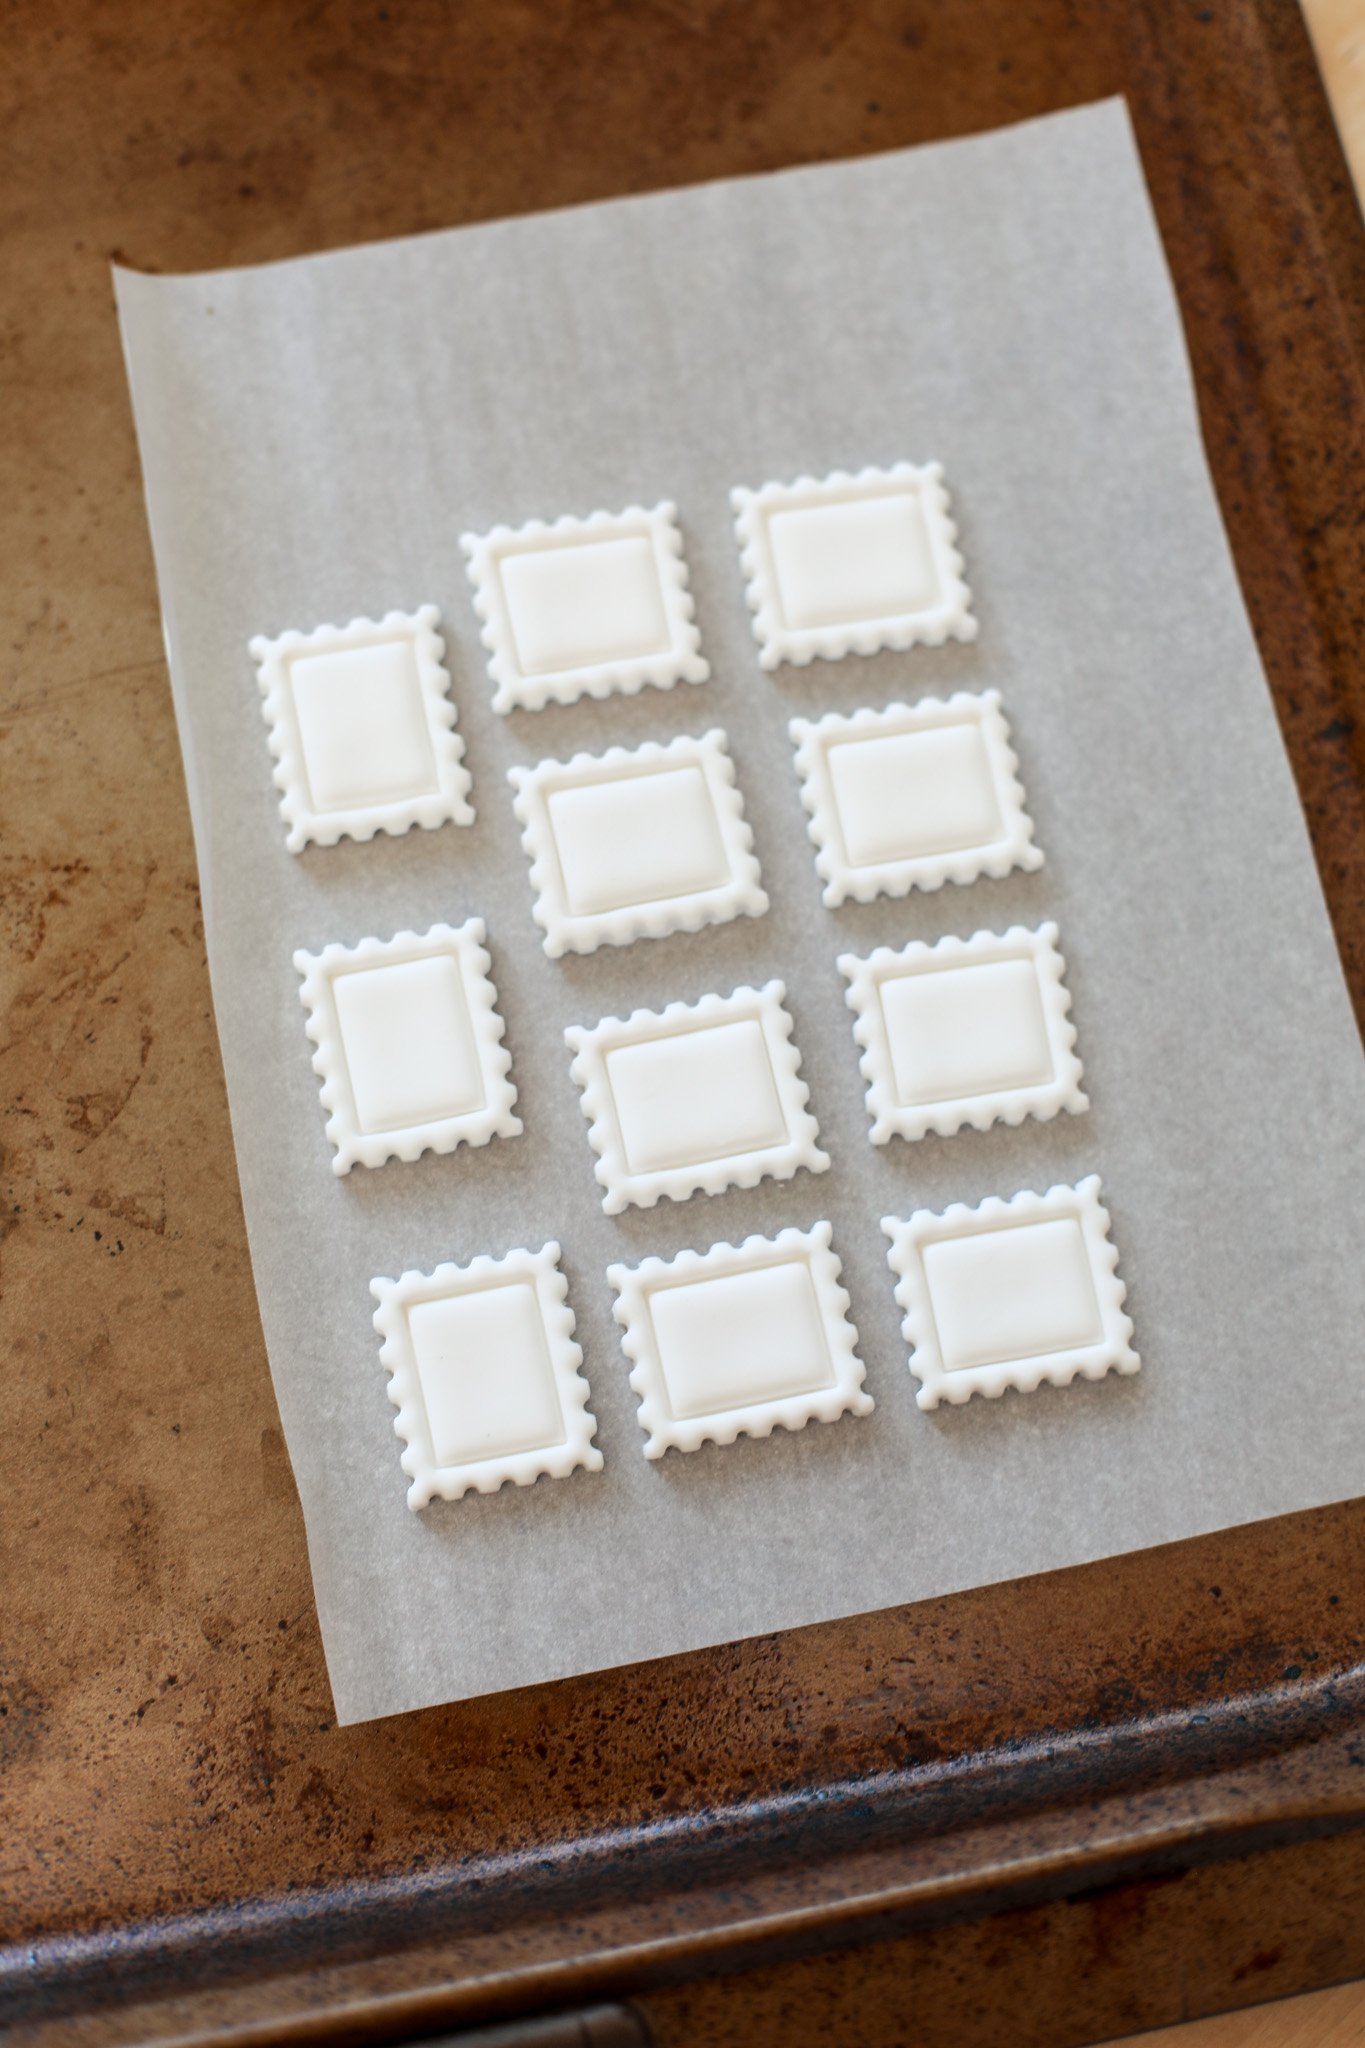
STEP 3: Place all your clay postage stamps on a parchment paper-lined sheet pan and place in your preheated oven for 30 minutes.
After 30 minutes, remove from the oven and allow the clay to fully cool and harden.

STEP 4: Next, we are going to decorate the stamps! You could totally paint little pictures in the middle of the stamps with acrylic paint, but I decided to use the decoupage method.
Use your postage stamp cutter again as a guide to find what design you would like from your paper napkin or scrapbook paper. Trace the rectangular outline inside the box with a pencil.
Cut out the little rectangle from the paper napkin and peel off any extra layers of paper until you have one thin layer.

STEP 5: Paint on a very thin layer of matte Mod Podge to the inside square of your clay postage stamp. Then gently stick down your paper napkin design, smoothing down the edges into the creases of the postage stamp. Set aside to dry for a few minutes and repeat with all your remaining stamps.


STEP 6: Once all your stamps have dried for a few minutes, go back and paint on another thin layer of Mod Podge over the top of your paper to smooth down your design. If the paper starts to bubble up, don’t worry, it won’t be as noticeable when the Mod Podge dries.
Give the white edges of each postage stamp a coat of Mod Podge too to seal the clay! You don’t need to paint the back though, since this won’t be visible. Set aside to dry for 15 minutes or so.
STEP 7: Once your Mod Podge has dried, turn the postage stamps over and glue on your magnets to the back of each stamp with a small dab of E6000 glue. Be careful to keep all the stamps far enough apart from each other during this step, so that the magnets don’t pull together while your glue is curing overnight.

Allow your glue to cure for about 24 hours and then your magnets are ready to use! Stick them up on your refrigerator or any magnetic surfaces in your home to hang up pictures, mementos, and to-do lists!

I think making a set of these would be a great gift for a stationary-loving friend! I now want to keep an eye out for extra cute paper napkins to create a cute themed set. I also found that thin scrapbook paper worked well too for this project, you could maybe even cut out designs from a magazine you have around the house. The options are endless!

I hope you enjoyed this easy polymer clay project! I would love to see the designs you used if you try this out.
Hope your summer is off to a beautiful start! xo Rachael

