
Felt Cork Board Makeover (Back to School DIY!)
I can’t believe it is already “back to school” time of the year. I am not currently in the school phase of my life nor do I have kids, so it really doesn’t change much for me around here. But it does still signify the end of the summer and beginning of fall in my mind. It also, arguably, has some of the BEST shopping of the year… school supplies and fall fashion? Say less. There is also something about this time of the year that has a similar feeling to New Years for me, where you get a fresh start for the fast approaching -BER months. So despite having no need for new school supplies, just mind your business if you see me walking the aisles of Target’s back to school section perusing the cute office supplies.

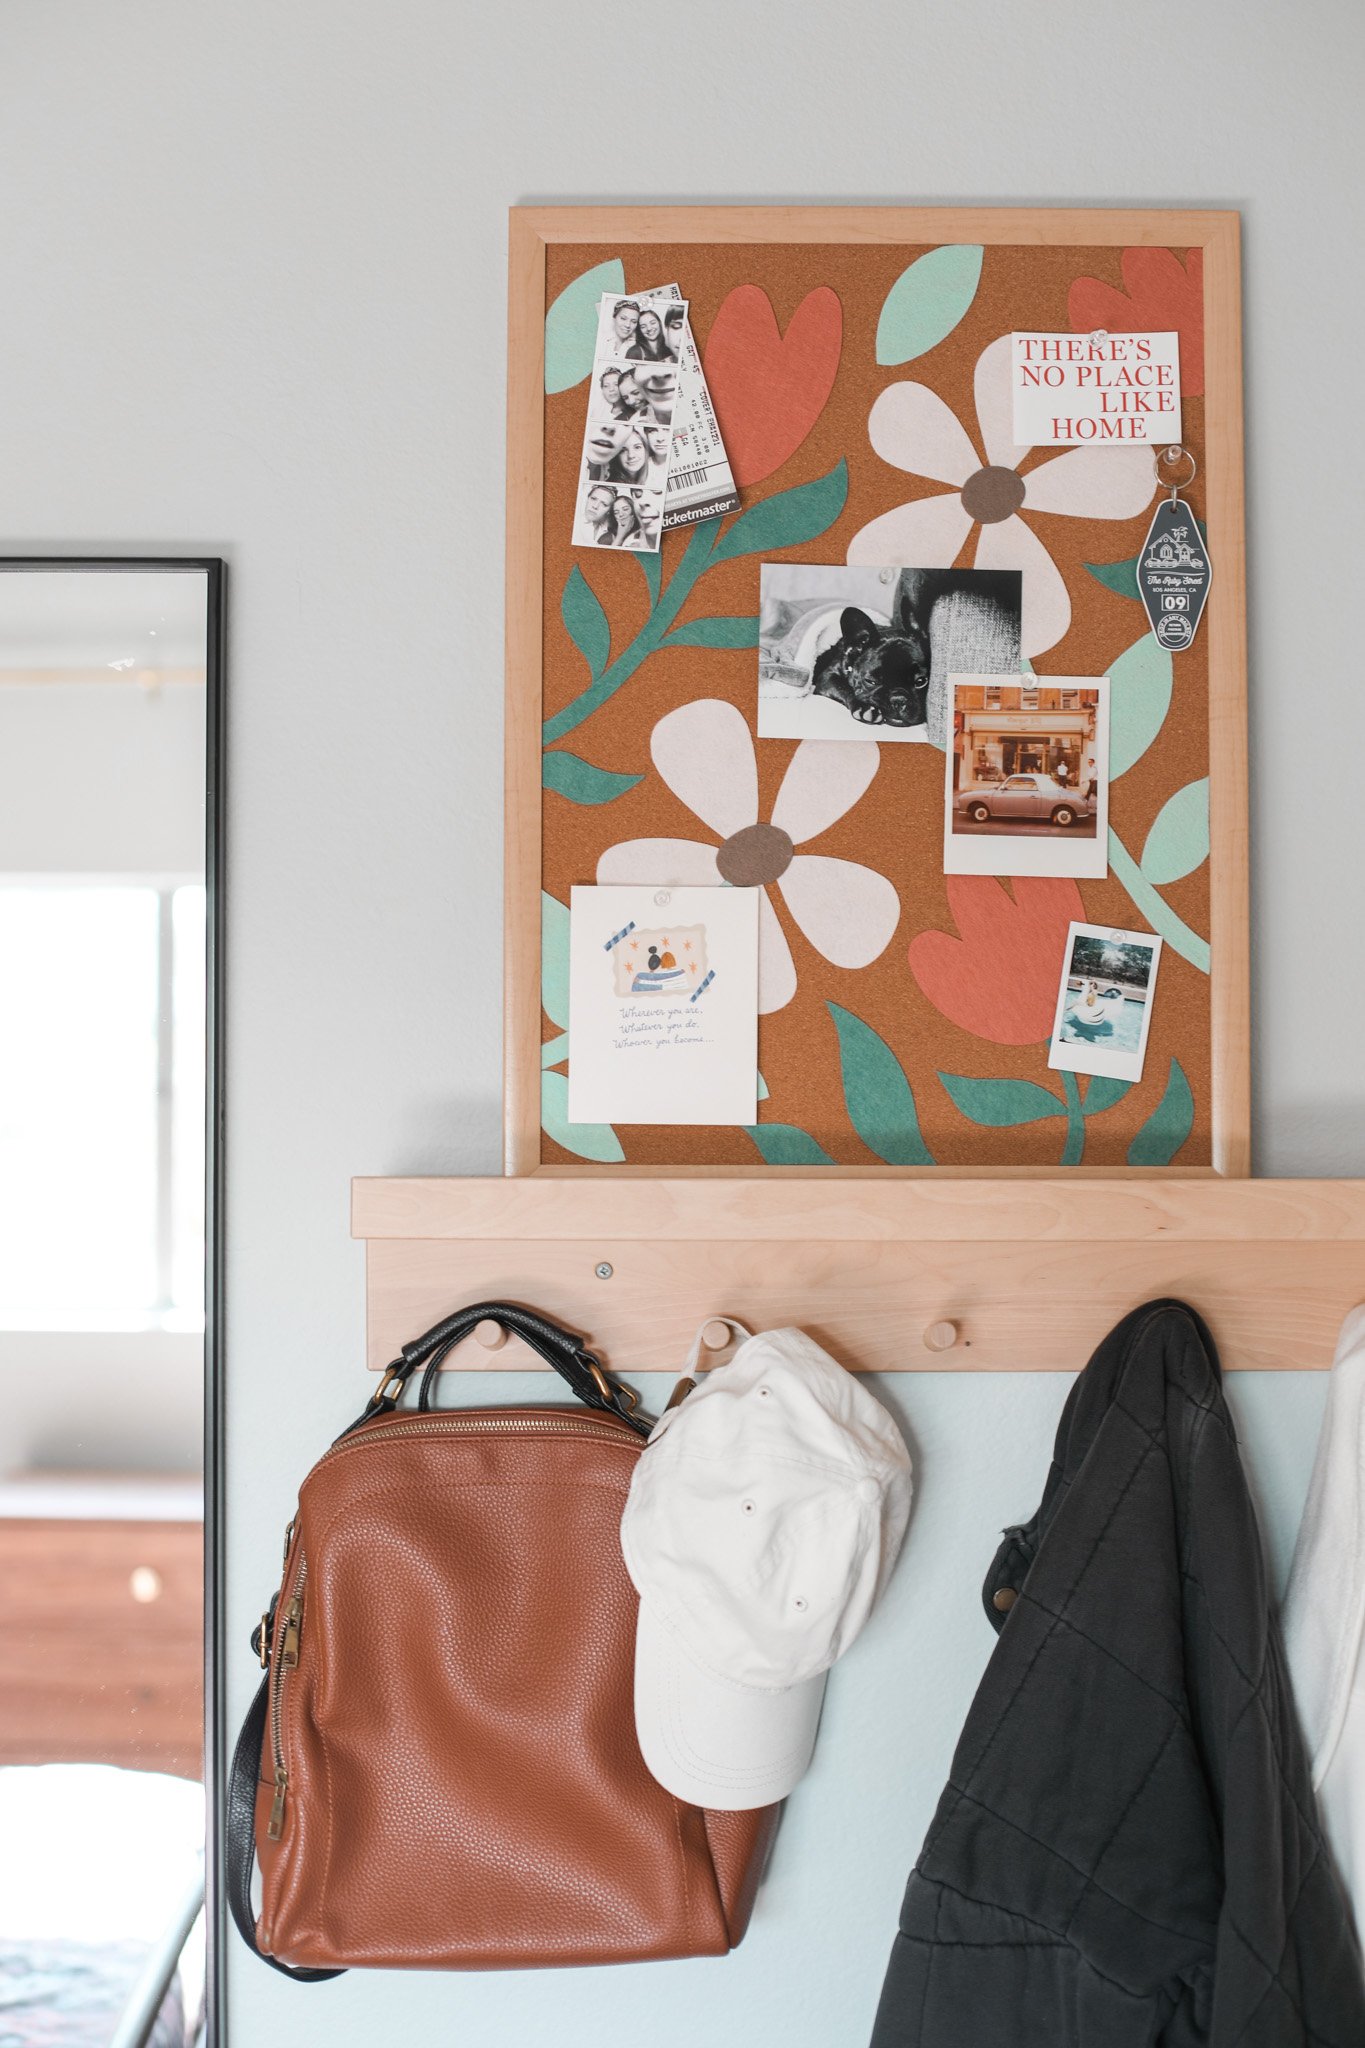
One office supply piece that I think is great for anyone looking to add some function and design to your space, is a cork board! These are great for displaying memories, tacking up reminders for upcoming events or to-do lists, and even for gathering inspiration. It can kind of be like making a full size scrapbook on your wall! Well I found this cute but simple framed cork board at Target, and decided I wanted to give it a makeover to add a little functional art to my wall.

I think this project would be so perfect to decorate your dorm room this season as well! You can totally customize the design to fit with your decorative style. And it makes a fun end-of-the-summer craft project for a lazy day at home! Check out how I made it below.


Affiliate disclosure: This post may contain affiliate links. When you buy from these links, I may earn a small commission, at no additional cost to you. As an Amazon Associate, I may earn commissions from qualifying purchases from Amazon.com. Thank you for your support!
HOW TO MAKEOVER A CORK BOARD WITH FELT (BACK TO SCHOOL DIY PROJECT)

Supplies:
Cork Board (I used this one in 17” x 23” size)
Scrap kraft paper (if you don’t have some in your recycling bin, you could also buy something like this)
Felt (in assorted colors — I love buying specific colors from this Etsy shop, but you can also find inexpensive sheets at your local craft store)
Scissors
Pencil/pen
Marker

STEP 1: To begin, you are going to cut a piece of scrap kraft paper the same size as your cork board. If your cork board has a frame like mine, you will want to measure just the space inside the frame.
Lay this sheet of paper flat on your work surface, and tape down the corners if needed.
STEP 2: You will begin to sketch out your drawing with a pencil on the paper. You are making a template of the shapes you will be cutting out of felt, so fill the space with any shapes that you want. My inspiration for this project was a piece of wall art I saw from Target that reminded me of a cork board, so I knew I wanted to do some kind of flower pattern.
You can be very messy with this process until you get your lines exactly how you want them. I drew things and erased again and again. I tried to cover my paper with a design with as little negative space as possible because I wanted the art to turn out really big and bold. But you can obviously do whatever type of design you want. Keep in mind your design will end up getting covered up with your cork board mementos, so I found the bigger the design the better.


STEP 3: Once you are happy with your design, go in with a black marker to finalize the outlines of the exact shapes you will be cutting out. Then, go one by one and write a number on each shape that will be cut out separately.
*At this point it is super important to take a photo of your design with your numbered shapes so that you can reference this when you need to put your project back together.

STEP 4: Cut out each shape individually.


STEP 5: Now you are going to pick out the felt colors you will be using for your design and group your shapes with the corresponding felt.
Turn each shape over (so the numbered side is facing down) on your felt and trace the outline with a pen or pencil. Carefully, cut out the outline on the felt. Turn the felt over and match it up with the corresponding paper template. Repeat with all the shapes that you cut out.

STEP 6: Next, using your photo as a guide, you are going to lay out your pieces on the cork board in the original spaces. This part is kind of fun because it is like doing a puzzle. It is easier to start with shapes coming off the edge of the the frame to get the placement as close as possible to the original.

STEP 7: Once you are happy with the layout of all your felt pieces, you can remove the numbered paper templates and throw them away. And you should be left with your felt design!
Now, you are going to adhere the felt pieces to the cork board. Take a few pieces at a time off the board and flip them over on a piece of scrap paper/cardboard. Give the back of them a generous but even coat of spray adhesive. Wait a few minutes for the adhesive to get tacky and then place them back down in place on the cork board. I found that taking off a few pieces at a time to spray was the best option so that I didn’t get confused about which pieces go where when I stuck them back on the cork board.
FYI The spray adhesive is very forgiving. For about 10 minutes, you are able to lift the felt back up and adjust if it is not in the exact right spot. But then after 10 minutes it should adhere strongly to the cork.

Allow the adhesive to fully dry over night and then your cork board is ready to use! The great thing about the felt design is that you can easily stick your push pins right into the felt so it doesn’t dimish the actual function of the cork board at all.


I love that you now have a really fun piece of homemade art to display even before adding anything to your board! And it is so customizable. The design options and felt color combinations are endless! I think it would be cute to do this with a leaf pattern for the fall season. Or even something as simple and trendy as a checkerboard pattern would be cute.
I hope this project inspires you to try out some DIY projects this year for back to school. If you are looking for any other ideas, I have these fun DIY Faux Leather Pencil Pouches that I made for back to school time last year that I still use today.
And if you’re heading back to school this year, wishing you all the best this semester!
xo Rachael

